
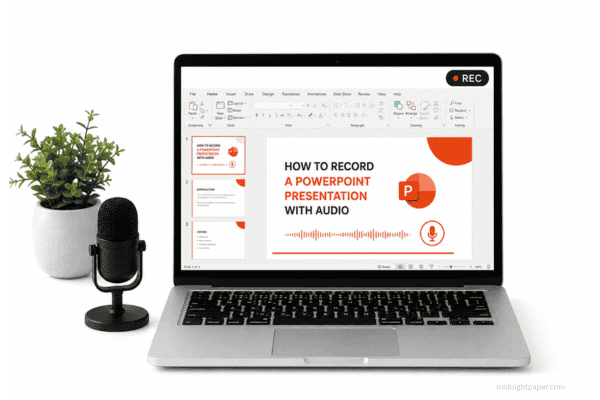
A very common question many people search for online is, “How to record a PowerPoint presentation with audio?” In this article, we will easily learn how to do this. Recording a narrated PowerPoint means adding voiceover or audio to your slides and possibly exporting the presentation as a video (MP4). This guide is for Windows (Office 365/2019/2016), Mac and PowerPoint Online. It explains how to prepare your slides and script, choose and set up a microphone, record each slide or the full slideshow, edit and trim audio, add background music and export the presentation. We indicate feature differences for each platform (for example, PowerPoint Online does not support slide-show recording).
We also share best practices for good audio quality, like mic placement and noise control, useful keyboard shortcuts and tips for accessibility, such as captions. A comparison table shows the features available on each platform and a final checklist ensures you don’t miss anything before and after recording.
Preparing your slides and script
Begin by finalizing your slides and writing out a script or detailed notes for what you’ll say on each one. Practice reading your script aloud and adjust phrasing so it sounds natural and conversational, not overly formal. The script should match each slide’s content. As you speak while recording, advance the slide (by click or keypress) to cue your next sentence. It’s best to pause briefly at the start and end of each slide: PowerPoint does not record anything during the slide transition, so leaving a half-second buffer of silence will prevent your narration from getting cut off.
Choosing microphone and audio settings
Use the best microphone you can. A USB headset with a boom mic or a USB condenser mic is far better than a built‑in laptop mic. Position the mic about 6–8 inches from your mouth and use a pop filter if available to reduce “p” and “b” pops.
In Windows or macOS sound settings, make sure that mic is the default input device before you start PowerPoint. Record in a quiet room, close windows and doors, turn off fans/AC and avoid rooms with hard, reflective surfaces (which can make your voice sound echoey). Test levels by making a short recording and playing it back to check for clarity, background noise, or clipping. Adjust the system/microphone input volume so your voice isn’t too quiet or peaking in the red.
Recording narration on Windows (Office 365/2019/2016)
In the Windows desktop app, you have two main options: slide show recording (records a full presentation with timings) or per-slide audio clips.
Enable the Recording tab (PowerPoint 2016/2019): If you don’t see a Recording tab in the ribbon, go to File > Options > Customize Ribbon and check “Recording” to add it.
Record Slide Show: On the Slide Show (or Recording) tab, click Record Slide Show. Choose “From Beginning” (or “From Current Slide” if you’re mid-deck). A Recording window opens. Click the Record button (round red dot) or press R to start. Begin speaking and click (or press space/N) to advance animations and slides as per your script. PowerPoint will record slide timings, animations and your narration together. You can pause (press Pause) or stop (press Esc) at any time.
Re-record or resume: If you make a mistake, press Esc to stop, go to that slideand click Record Slide Show again (choose “From Current Slide”) to redo just that slide’s narration. You can also delete the narration on a slide by selecting Record > Clear Recording > Clear Recording on Current Slide (or use the trash icon in the recording toolbar) to start over.
Insert > Record Audio (per slide): For short voice clips on individual slides, go to the slide, click Insert > Audio > Record Audio. Give the clip a name, hit Record, speakand then Stop and Play to check it. Move the audio icon if needed (you can hide it later). This creates a WAV clip on that slide; it’s useful for short narrations or adding sound effects/music.
Screen recording (Windows): Under Insert, there’s a Screen Recording tool (Office 2016+ on Windows). You can select an area of your screen and record it along with microphone audio. This embeds a video on a slide. (Useful for demos, but not for recording your voice over slides, so optional.)
Review: While recording, you can advance slides with N or Space, go back with P and end the show with Esc. After recording, use the Play button in the recording toolbar (or just play the Slide Show) to preview the sync of audio with slides.

Recording narration on Mac (Office 365/2019/2016)
PowerPoint on Mac also supports slide show recording. Open your presentation and go to the Slide Show tab. Click Record Slide Show to begin. The interface is similar: you may see a recording toolbar at the top. Click the red Record button to start speaking. If your Mac triggers the camera view by default, click the video icon on the toolbar to turn it off (so only audio is captured).
Advance slides as you talk. To pause or stop, press Esc or click the Stop button. If you need to redo a slide, stop recording, go to that slide and start recording again from that slide. When finished, close the recording session. Each slide will now have an audio icon (a speaker) which you can hide or move.
On macOS, you can also use Insert > Audio > Record Audio for per-slide clips, similar to Windows. Once done, save your PPT. To get a video, use File > Export and choose MP4 (options let you pick resolution and use recorded timings/narration). Unlike Windows, Mac doesn’t have the same “Recording” tab, but feature-wise it’s largely the same (aside from some Windows-only stuff like Cameo video modes).
Recording in PowerPoint Online (Web)
PowerPoint for the web cannot record slide show narration or timings. The Record buttons simply aren’t available in the online app. You can only insert pre-made audio files. For example, click Insert > Audio in the ribbon to upload an MP3, WAV, M4A, AAC, or OGA file from your computer. (Note: web PPT limits audio file size to 16 MB.) In other words, for recording voiceover you’ll need the desktop app. A common workaround is to download the file (File > Download a Copy), open it in desktop PowerPoint and record or export there. Alternatively, you can record your screen with a separate app (e.g. Zoom or online recorder) while presenting the slides on screen, but that’s outside PowerPoint’s built-in tools.
Working with recorded audio


After recording, you can trim and edit clips. In any slide, select the audio icon and go to the Playback tab. Click Trim Audio to open the trim dialog: set the green marker at where you want the audio to start and the red marker at where you want it to end. You can also use Fade options (fade-in/out durations) and adjust volume on this tab. Under Playback, you can set how the audio plays: for example, Play Across Slides or Loop until Stopped to have background music continue through the show, or Play in Background to make a clip automatically loop and hide the icon.
If you need to delete a recording, on the Record tab use Clear Recording (current slide or all slides) to remove the audio from slides. Then you can re-record. Remember that re-recording one slide’s audio doesn’t affect the others, since each slide has its own clip (PowerPoint embeds separate WAV files per slide).
Background music
To add music, insert an audio file (Insert > Audio > Audio on My PC) or add embedded audio. On Playback, set Start: Play in Background to have it run across all slides as background music. You can loop it or fade it in/out as needed. Keep background levels low under your voice narration.
Exporting your presentation (PPTX, MP4)
Your narrated presentation is saved as a normal PPTX with audio clips embedded. To share it as a video, use File > Export > Create a Video (or on the Recording tab, Export to Video). Choose a video quality: 1080p (Full HD) is usually enough, or 4K for very high detail (at the cost of large file size). By default PowerPoint will include your recorded timings and narrations; you can verify the second dropdown says “Use Recorded Timings and Narrations”. The video is saved as MP4 (Windows) or MOV/MP4 (Mac) with your audio. Higher resolutions mean bigger files, so for a quick share you might try a lower resolution.
If you only want the audio, there is no direct “export audio” in PowerPoint, but you can right-click an audio icon and save the media as a file on Windows, or use the screen recorder audio. Alternatively, you could record using an external program (like Audacity or voice recorder) and import the finished WAV/MP3 into the slide (Insert > Audio).
After recording and exporting, use PowerPoint’s media optimization to shrink file size. Go to File > Info and click Optimize Media Compatibility or Compress Media to let PowerPoint reduce audio bitrate and compress video. This avoids bloated PPT/MP4 sizes.
Troubleshooting tips
- No audio playback? Make sure your speakers/headphones are working and the audio icon isn’t hidden off-slide. In Windows, check Sound settings to ensure the correct speakers are default.
- Microphone not recording? Check OS privacy/permission settings and that the correct mic is selected in PowerPoint (on Windows use Control Panel > Sound > Recording).
- Low or noisy audio? Re-record in a quieter space or adjust mic volume. Use noise reduction later in an audio editor if needed (PowerPoint has no built in noise filter).
- Long recordings glitching? Some users found very long (>10 min) Mac recordings misbehave (see MS forums). If this occurs, try splitting into shorter segments or updating PowerPoint.
- Timings off by a second? Manually adjust slide durations on the Transitions tab if needed, or re-record that slide.
- Captions/Subtitles: PowerPoint doesn’t auto-generate captions during recording. If you need captions on the final video, you must create a caption file. You can write an SRT/VTT caption file yourself or use Microsoft Stream to auto-generate one from your narration, then in PowerPoint add it to the exported video.
Keyboard shortcuts
During recording, handy shortcuts include: R (or click the red button) to start, S (or Alt+S) to stop. Use N, Space or Enter to advance slides, P to go back, B to blackout, W for whiteout and Esc to end the slide show. If you need to erase on-screen ink/pen drawings, press E. For precise control, the recording toolbar’s pause, previous and delete buttons are also clickable.
Accessibility (captions)
For learners who need captions, you can generate them separately. After exporting to video, go to the Playback tab (on the video) and choose Insert Captions to add an existing .vtt or .srt file. You can create this file by manually transcribing or by using Microsoft Stream’s auto-transcription on your recording. PowerPoint itself won’t auto-transcribe as you record, so plan to add captions post-production if required.
Platform/Version Comparison
| Platform / Version | Record Audio? | Export MP4? | Notes / Limitations |
| Windows (Office 365/2019/2016) | Yes, full slide show narration and per-slide recording | Yes, via File > Export > Create a Video | Full recording tools (Recording tab). Can record webcam video. Screen recording available. Must enable the Recording tab on older versions. |
| Mac (Office 365/2019) | Yes, slide show recording and per-slide | Yes, Export to MP4 | Similar to Windows. Camera can be toggled. Lacks some newest M365 features (e.g. Teleprompter view) but can still export MP4. |
| PowerPoint for Web | No (cannot record narrations or timings) | No (only PPTX download) | Can insert audio files (MP3/WAV etc., up to 16MB). Lacks slide-record feature; use desktop app or screen recording as a workaround. |
Final Checklist
- Before Recording: Finalize slide order and visuals. Write and rehearse a script. Check your microphone: select the correct device in your system settings and test by recording a short clip. Choose a quiet recording location (no background noise or echo). Close unnecessary apps or notifications to avoid interruptions. Have your slides in view and notes ready as you record.
- During Recording: Speak clearly and at a steady volume. Leave a brief pause at each slide’s start and end. Avoid speaking while clicking to the next slide (per-slide transitions don’t record). Keep the same distance from the mic throughout.
- After Recording: Play back at least the first slide’s audio to ensure it recorded correctly. Review each slide’s audio clip; trim silence or errors (Playback > Trim) or re-record any problematic slide. Save your PowerPoint file. Go to File > Export > Create a Video, choose resolution and export (MP4). Finally, use File > Info > Compress Media to optimize audio/video size. If needed, add captions before sharing.
This approach will leave you with a narrated slideshow (or video) that’s ready to share, with clear audio and proper timings. Practice and testing are key make use of the preview/playback tools to ensure a smooth final presentation.
Sources: Official Microsoft Support documentation on recording in PowerPoint and related guides, along with expert advice on narration best practices.